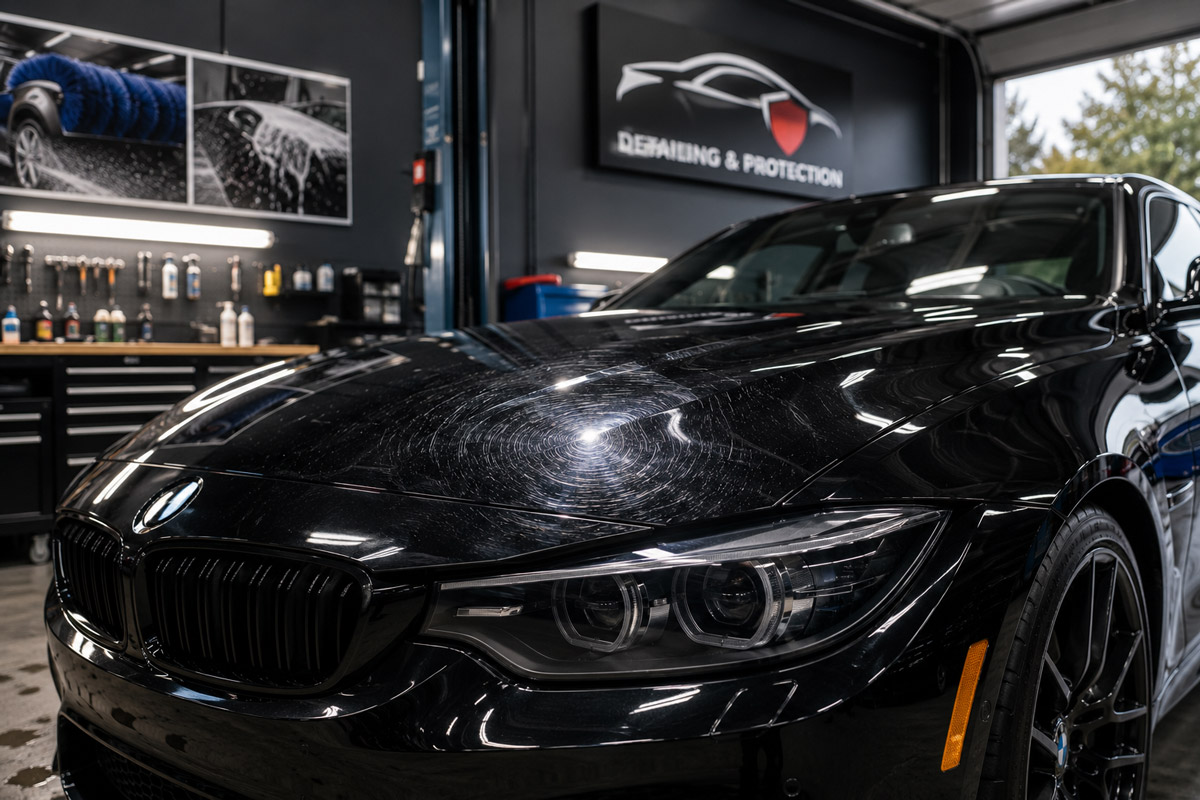
Every car owner loves the convenience of a quick drive-through car wash. It takes less than five minutes, costs very little, and leaves your vehicle looking clean from a distance. However, when you pull into the sunlight, you might notice something disheartening: a web of fine, circular scratches covering your beautiful paint.
These are known as swirl marks. While a single trip through a mechanical tunnel won’t destroy your vehicle instantly, consecutive visits create thousands of random, microscopic scratches. When sunlight hits these micro-fissures, the light scatters in a spiderweb pattern that completely ruins your vehicle’s gloss and depth.
If you want to restore that deep, mirror-like reflection, it helps to understand why this happens and how you can safely fix it.
The Primary Causes of Automatic Car Wash Swirl Marks
Your vehicle’s paint is protected by a thin top layer called a clear coat. While the clear coat shields the underlying color from UV rays and minor environmental elements, it is relatively soft and highly susceptible to physical friction. Standard drive-through car washes damage this clear coat through several common mechanisms.
1. Contaminated Rotating Brushes
The massive, rapidly spinning foam or cloth rollers inside a tunnel wash are highly efficient at removing dirt. Unfortunately, they are equally efficient at trapping abrasive sand, mud, and road grit left behind by previous dirty trucks or off-road vehicles. As these heavy rollers slap against your vehicle, they essentially sandblast those trapped particles directly across your paint.
2. High-Speed Mechanical Friction
It is not just the presence of dirt that causes the damage; it is the sheer force involved. The high mechanical velocity of automated equipment drags sharp, trapped grit across the soft clear coat under immense pressure. This aggressive friction carves micro-scratches into the surface, creating a dull, hazy appearance over time.
3. Harsh Cleaning Chemicals
Many drivers choose “touchless” automatic car washes to avoid brush damage. While touchless washes eliminate physical contact, they compensate by using highly aggressive, high-pH chemicals to strip away road grime. These harsh detergents strip away protective waxes and sealants, leaving your clear coat raw, unprotected, and incredibly easy to mar during subsequent cleanings.
4. Abrasive Drying Towels
The damage does not always stop when you exit the tunnel. At the end of many automatic washes, attendants use large drying towels to wipe down incoming vehicles. These towels frequently accumulate hidden dirt from lower body panels and wheels. When reused on your vehicle, they drag residual grit right over your freshly washed paint.
How to Fix Swirl Marks: Three Reliable Solutions
Washing your car will not wash away these micro-scratches. Because swirl marks are physical valleys carved into your clear coat, you must either permanently level out the surrounding paint or temporarily fill the damage. Depending on your budget, timeline, and detailing experience, you have three main paths forward.
1. Professional Paint Correction (The Permanent Fix)
The most effective way to eliminate swirl marks is through professional paint correction. A skilled detailer utilizes specialized abrasive compounds, leveling polishes, and dual-action machinery to carefully shave down the microscopic high spots of the clear coat until it matches the depth of the scratches. This creates a perfectly flat, highly reflective surface.
- 1-Step Paint Correction ($500 to $800): This service utilizes a single polishing pad and a medium-cut polish. It removes roughly 50 to 60 percent of light swirls, cleans up minor oxidation, and drastically boosts the vehicle’s gloss.
- 2-Step Paint Correction ($1,000 to $1,500): For heavily weathered or deeply swirled paint, a two-step process is required. The detailer first uses an aggressive cutting compound to eliminate up to 90 percent of heavy defects, followed by a ultra-fine finishing polish to restore complete clarity and depth.
2. DIY Machine or Hand Polishing (The Budget Fix)
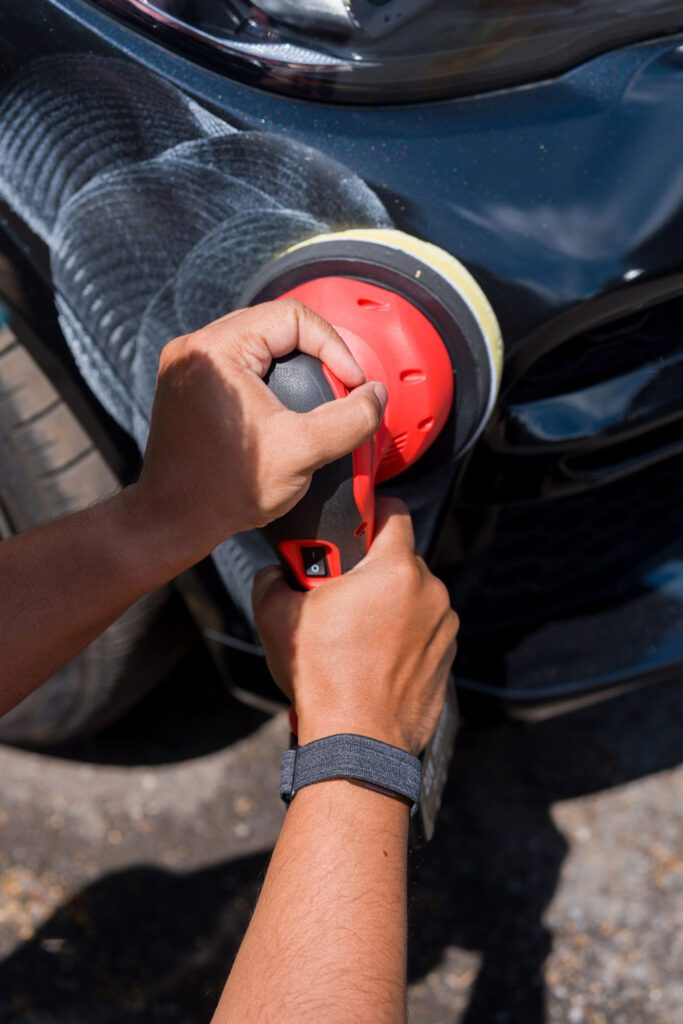
If you enjoy working on your own vehicle and want to save on labor costs, you can tackle mild swirl marks at home. It requires patience, proper technique, and the correct sequence of steps to ensure you do not introduce further marring.
1.Thoroughly Wash and Decontaminate:Requires a clean workspace.
Perform a meticulous hand wash using clean wash mitts. Follow this with a dedicated clay bar treatment to pull out embedded metallic fallout and bonded contamination from the pores of the clear coat.
2.Select Your Polish and Applicator:Choose appropriate pad stiffness.
Pick a high-quality swirl remover or fine-cut polishing compound. If working by hand, use a dedicated foam applicator pad. For faster, more uniform results, opt for a dual-action orbital polisher equipped with a light polishing foam pad.
3.Polish in Small, Managed Sections:Work in a 2×2 foot grid.
Apply a few pea-sized drops of polish to your pad. Work in small sections using straight, overlapping horizontal and vertical passes. Avoid circular motions, and let the polish break down cleanly on the surface.
4.Wipe the Surface Clean:Use zero downward pressure.
Gently wipe away the remaining polish residue using a fresh, ultra-plush microfiber towel. Inspect your work under direct lighting to verify scratch removal before moving to the next section.
3. Glazes and Waxes (The Temporary Mask)
If your clear coat is too thin for correction or you want a quick cosmetic improvement without compounding your paint, you can opt to hide the damage. Applying a high-quality ceramic wax, glaze, or paint sealant fills the microscopic valleys of the scratches.
By leveling the surface with a transparent layer of wax, light can reflect cleanly off the car again, making the swirls virtually invisible. However, this is only a temporary mask. Once the protective layer naturally degrades from UV exposure and weekly washes over a few months, the underlying swirl marks will reappear.
How to Prevent Future Swirl Marks
Fixing your paint takes effort and investment, so it is vital to protect your hard work. Adjusting your maintenance regimen will ensure your clear coat remains flawless, glassy, and scratch-free.
- Ditch the Mechanical Brush Washes: Avoid automated tunnel washes that rely on physical contact blankets or rollers. If you must use an automated wash, stick exclusively to touchless systems, and ensure your vehicle has a strong baseline layer of paint protection.
- Utilize a Pre-Soak Foam Cannon: Before you ever physically touch your paint with a wash mitt, cover the vehicle in a thick layer of alkaline or citrus-based snow foam. Let it sit for a few minutes to loosen up heavy grit and road film safely.
- Adopt the Two-Bucket Method: Always use two independent buckets when hand-washing. Fill one with soapy water and the other with pure rinse water. Both buckets should feature a raised grit guard at the bottom, allowing you to rinse out dirt from your microfiber wash mitt before dipping it back into the clean soap.
- Use Lubricated or Touchless Drying Techniques: Dragging a dry towel across dry paint is a recipe for instant marring. Instead, use a premium plush microfiber drying towel paired with a ceramic spray wax as a slick drying lubricant. Alternatively, use a high-powered leaf blower to blow water completely out of the cracks without touching the surface at all.
- Apply True Paint Protection: The ultimate defense against physical marring is a professional ceramic coating or a high-grade Paint Protection Film (PPF). Ceramic coatings add a hard, sacrificial barrier that resists minor environmental wear. PPF goes a step further by providing a thick polyurethane shield that features self-healing properties, allowing fine surface swirls to literally melt away under the warmth of the sun.
Tell Us About Your Vehicle
To help determine the safest, most efficient path forward for your car’s specific finish, consider these factors:
- What color is your vehicle? Darker tones like gloss black, deep metallic blue, and dark grey reveal clear coat swirl marks significantly faster than silver or white.
- Are you looking for a practical DIY project, or are you considering a permanent professional correction?
- Do you have access to a residential driveway or garage setup where you can safely wash the vehicle by hand?