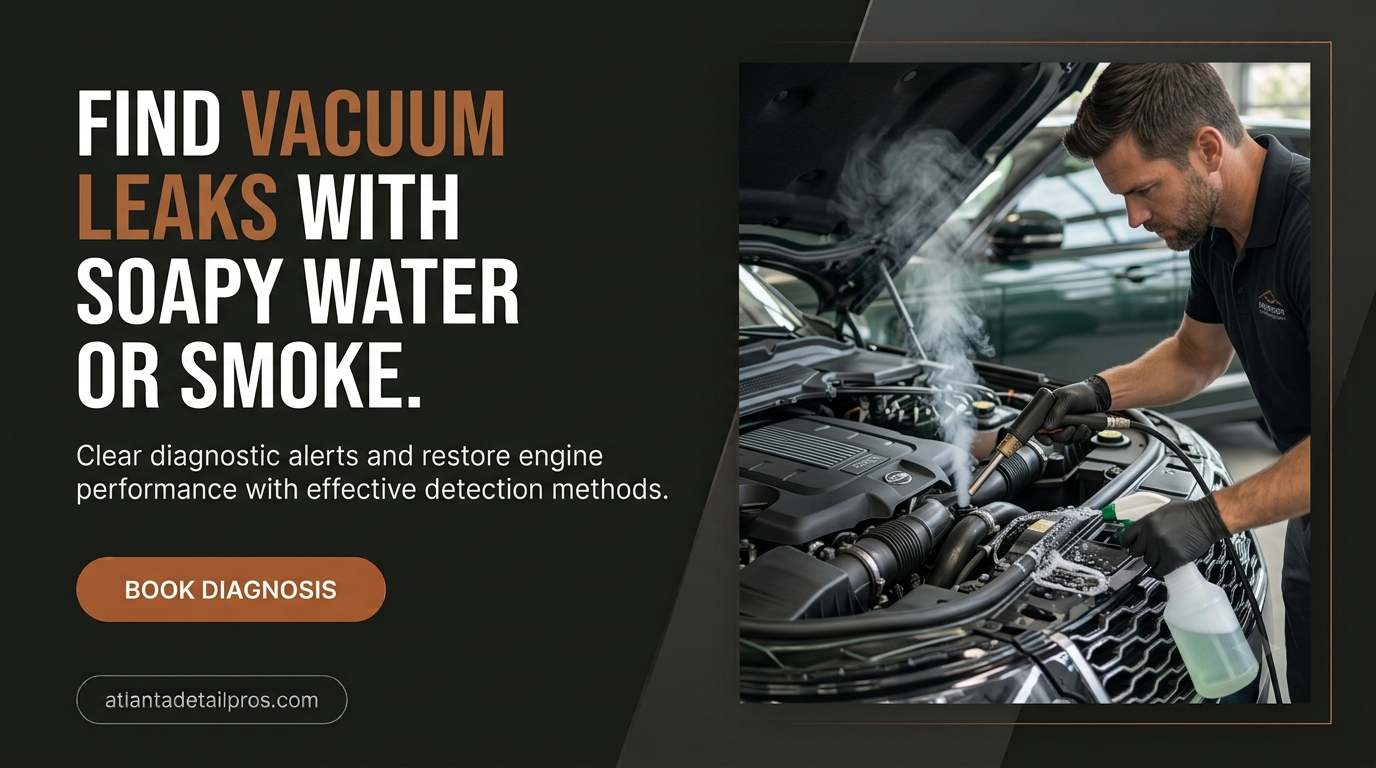
The check engine light came on, the idle is rough, or the car feels like it is constantly fighting to hold a steady RPM at a stop. You pulled the codes and got a P0171 or P0174, or maybe the shop told you there is a vacuum leak somewhere but handed you a quote instead of a location. Now you want to find it yourself.
Vacuum leaks are one of the most common causes of rough idling, lean fuel trim codes, and poor performance, and they are also one of the more satisfying things to diagnose at home because two simple methods can find nearly any leak: soapy water and smoke. The methods work differently, cost almost nothing to set up, and between them they can pinpoint what a visual inspection alone will miss.
This guide walks through both methods step by step, the safety rules that matter, where leaks actually hide on most engines, and what to do the moment you find one.
What a Vacuum Leak Does to Your Engine and Why the Car Is Pointing You Here
Your engine relies on a sealed intake system. Air enters through the air filter, passes the mass airflow sensor (MAF) where it gets measured, then travels through the throttle body and into the intake manifold and cylinders. Every bit of air that enters the engine is supposed to pass through that MAF sensor so the computer can inject the right amount of fuel to match.
A vacuum leak is any unintended opening downstream of the MAF sensor. Air that slips through a cracked hose, a failed gasket, or a loose fitting goes unmetered. The engine receives more air than the computer accounts for, the fuel mixture goes lean, and the oxygen sensors report back that something is off. The computer tries to compensate by adding fuel (positive fuel trim), but if the leak is large enough, it cannot correct the imbalance fully. Rough idle, hesitation, and lean codes follow.
Common symptoms that send people looking for a vacuum leak:
- Rough or unstable idle, sometimes surging or hunting RPMs
- Check engine light with P0171 (system too lean, Bank 1) or P0174 (system too lean, Bank 2)
- Hissing or whistling sound from the engine bay
- Poor fuel economy
- Hesitation or stumble during light acceleration
- Hard starting, especially when cold
If both P0171 and P0174 are stored together on a V6 or V8 engine, a large central leak is usually the cause, such as an intake manifold gasket or a hose that feeds the entire manifold. If only one bank shows the lean code, a smaller localized leak is more likely.
Start With What You Can Hear and See Before Spraying Anything
Before you reach for the spray bottle or the smoke machine, spend five minutes doing a visual and auditory check with the engine running. This costs nothing and occasionally finds the leak on the spot.
Listen With the Hood Up
A significant vacuum leak usually produces a hissing or whistling sound. Start the engine and listen carefully in the engine bay while the car is at idle. Move your ear systematically from the front of the intake toward the back. Large leaks on the brake booster hose, intake boot, or manifold can be clearly audible. If you hear it, follow the sound to its source before trying any spray method.
Do a Visual Trace of Every Vacuum Line
Most engine bays have a vacuum hose routing label on the underside of the hood or on a nearby sticker. Follow each vacuum line from its source to its destination and look for cracks, splits, kinks, disconnected ends, or areas where the rubber has hardened and pulled away from a fitting. Pay extra attention to hoses near heat sources and sharp edges, where chafing and cracking are most common.
Check the Intake Boot
The large rubber duct that connects the air filter housing to the throttle body is a frequent failure point. Squeeze it firmly while the engine runs and listen for any change in idle. Turn it to inspect the underside, where tears often develop and go unseen during a normal top-down look.
SAFETY: Do not put your hands near drive belts, pulleys, or the cooling fan during any inspection with the engine running. Keep loose clothing and hair away from moving parts.
If you find the leak during this visual phase, you are done with detection. If you hear a hiss but cannot locate the source, or if everything looks intact but the symptoms persist, move to the soapy water method or the smoke test.
The Soapy Water Method: Step by Step
Soapy water is the low-cost, no-equipment method. It works by revealing escaping air as bubbles at the leak point. The engine needs to be running for this method because vacuum is only present when the engine is pulling air. You are looking for bubbles forming at a joint or seam when the solution contacts escaping air.
What You Need
- A clean spray bottle
- Dish soap and water mixed roughly 50/50, or slightly heavier on the soap
- A flashlight
- Safety glasses
Do not use carburetor cleaner, brake cleaner, starting fluid, or propane for this test. Those methods work by causing an RPM spike when the flammable substance is pulled into the intake, but they create a fire risk around a hot engine and hot catalytic converter. Soapy water is safer, produces a clear visual result, and does not require an open flame or flammable aerosol near the intake.
SAFETY: Soapy water is safe, but the engine is hot and moving. Do not spray near the throttle opening, alternator, or any electrical connectors. Do not stand in the path of any belts or pulleys. Keep the spray away from the hot exhaust manifold and catalytic converter.
Step-by-Step Process
1. Warm up the engine. Let the car reach normal operating temperature before testing. The idle is more representative of the leak behavior once the engine is fully warm, and thermal expansion can open or close small leaks depending on material.
2. Work in sections, not all at once. Spray one area at a time so you know which section produced bubbles when you find them. Spraying the entire engine bay at once makes it impossible to pinpoint the source.
3. Start at the intake boot and throttle body connection. Spray along the clamp area where the boot meets the throttle body inlet. Watch for bubbles forming at the seam. Then spray along the full length of the boot, rotating it gently if accessible.
4. Move to the throttle body base gasket. Spray along the flange where the throttle body meets the intake manifold. Bubbles here indicate the throttle body gasket has failed.
5. Spray each small vacuum hose at its connection points on both ends. The fitting where the hose slides onto a nipple is the most common failure point on small vacuum lines, not the middle of the hose.
6. Check the brake booster hose where it enters the intake manifold and where it connects to the booster itself. This is a large-diameter hose and any leak here will be easy to see with bubbles.
7. On V6 and V8 engines, spray along both sides of the intake manifold where it meets the cylinder heads. Intake manifold gasket leaks are common on higher-mileage engines and often on specific vehicle platforms.
8. Watch closely for 10 to 15 seconds after each spray. Bubbles can take a moment to form, especially on a very small leak. A large leak will bubble immediately. A small one may show just a slow shimmer of foam at the joint.
One limitation of the soapy water method: it does not work well in areas where you cannot physically spray and then clearly observe the surface. Deep inside a V-shaped intake manifold, behind components with little clearance, or on surfaces blocked by other parts, bubbles can form but be impossible to see. That is where the smoke test earns its value.
The Smoke Test: How It Finds What Soapy Water Misses
A smoke test fills the intake system with a fine, visible vapor and then reveals every leak point as a plume of escaping smoke. It finds leaks that are inaccessible to soapy water, too small to bubble visibly, or located in areas where the spray cannot reach. The smoke test is done with the engine off.
What Produces the Smoke
Purpose-built automotive smoke machines use mineral oil, baby oil, or a dedicated smoke fluid heated by a heating element to produce a dense, non-toxic vapor. They connect directly to the intake system and introduce smoke at low pressure (1 to 2 PSI) that fills the sealed intake and escapes wherever there is an opening. Affordable units are available for $60 to $150 online and at tool retailers. Some shops also rent them by the day.
A DIY alternative that many mechanics use: a party fog machine running standard fog juice (glycerin-based). It produces the same type of dense, harmless vapor, connects to a shop-built adapter, and costs about $30 for the machine and a few dollars for the fluid. The principle is identical to a commercial smoke machine.
Step-by-Step Smoke Test Process
1. Turn the engine off and let it cool for at least 15 minutes. The smoke test is performed with the engine off. You are pressurizing a cold, sealed intake system, not running the car.
2. Find the entry point. The most common connection point is the large intake boot between the air filter housing and throttle body. Disconnect the air filter housing from the boot at the airbox end, cap the boot opening temporarily with a rag or plug, and connect the smoke machine hose to the boot at its other end. Alternatively, disconnect the brake booster vacuum hose from the intake manifold, plug the booster end, and introduce smoke through that port.
3. Cap all other planned openings. Block the throttle plate by holding it closed manually or taping a piece of cardboard temporarily over the throttle body opening if you are introducing smoke from the other direction. The goal is to seal the system so smoke has nowhere to exit except through a leak.
4. Start the smoke machine. Let it fill the system for 30 to 60 seconds before you start looking. You want the smoke pressure to build enough to push through even small openings.
5. Search systematically with a flashlight. Move the flashlight slowly across every seam, gasket surface, hose connection, and sensor port. Look for a thin ribbon or wisp of smoke seeping out from the surface. Large leaks will produce obvious streams. Small leaks will show a faint curl of smoke, sometimes only visible when you aim the flashlight at an angle across the surface.
6. Check the expected locations: intake manifold gasket surfaces, throttle body gasket, all small vacuum hose connections, the PCV valve and its hose, any vacuum sensor ports, and the injector seats if the system can reach them.
7. Mark each leak point as you find them. Use tape, a grease pencil, or take a photo so you have a map of every leak before you disassemble anything.
IMPORTANT: The smoke machine introduces smoke at very low pressure, typically 1 to 2 PSI. Do not use compressed air directly into the intake. Standard shop air is far too high a pressure and can damage intake manifold gaskets, diaphragms, and sensors.
The smoke test will reveal every external leak from the intake and vacuum system simultaneously. It is the method of choice for finding fuel injector O-ring leaks and intake manifold gasket leaks that are buried deep under hoses and sensors.
The table below compares how well each method performs at the most common vacuum leak locations. Use it to decide which method to reach for first based on where your symptoms suggest the leak is.
Leak Location | Soapy Water | Smoke Test | Notes |
|---|---|---|---|
Vacuum hose (small diameter) | Good for cracks at connections | Excellent, catches hairline cracks | Most common failure on high-mileage cars. Check near clamps and bends first |
Intake boot / air duct | Good on accessible sections | Excellent | Tears often on the bottom where the boot contacts other components. Easily missed visually |
Throttle body gasket | Good along accessible edges | Excellent | Bubbles form along the throttle body flange with soapy water. Smoke seeps visibly from the joint |
Intake manifold gasket | Moderate: some areas hard to reach | Excellent | Smoke finds runner-end leaks that soapy water struggles to reach. Common on V6/V8 engines |
PCV valve or PCV hose | Good at hose connections | Good | PCV system is under positive crankcase pressure, not vacuum. Can push oil mist through failed hose or grommet |
Brake booster hose | Good at hose ends | Good | A failed booster diaphragm needs to be tested separately; smoke enters the booster but will not reveal an internal diaphragm tear |
Fuel injector O-ring | Difficult: access tight | Excellent | Smoke seeps from around the injector seat in the intake manifold. Hard to see without smoke |
MAP / vacuum sensor port | Good | Good | Cracked sensor port or loose sensor hose. Often overlooked because the sensor hose is short and hard to trace visually |
For most small hose leaks, soapy water is fast and effective. For gasket leaks, injector O-rings, and any leak in a hard-to-reach location, smoke is the right tool.
Where to Look: The Most Common Vacuum Leak Locations on Most Engines
Vacuum leaks can technically happen anywhere in the intake system, but they follow predictable patterns based on what materials fail first and what areas see the most heat and movement.
Small vacuum hoses: These thin rubber or plastic lines run to the brake booster, MAP sensor, EGR valve, EVAP purge valve, and idle control components. They dry out and crack with age and heat. Hoses near the exhaust manifold or turbocharger fail earliest. Every hose end at its fitting connection is a potential leak point.
Intake boot (air duct): The large rubber accordion duct from the air filter to the throttle body is thick and durable but can crack at its bends or split along its underside when it contacts other engine components. Inspect the full perimeter, not just the top.
Throttle body gasket or O-ring: The seal between the throttle body and the intake manifold can fail with age, especially on plastic intake manifolds where thermal cycling stresses the joint. Spray the full perimeter of the throttle body flange.
Intake manifold gaskets: On V6 and V8 engines, the intake manifold gaskets seal the manifold to both cylinder heads. These are a known failure point on higher-mileage engines, particularly on certain Ford, GM, and Chrysler V6 and V8 platforms. Symptoms include both P0171 and P0174 simultaneously on V engines, and sometimes coolant consumption if the gasket also seals a coolant port.
PCV system: The positive crankcase ventilation system routes blowby gases from the crankcase back into the intake. A stuck-open PCV valve, a cracked PCV hose, or a failed PCV grommet can all act like a vacuum leak, introducing unmetered air into the intake.
Brake booster hose and check valve: The brake booster uses engine vacuum to multiply braking force. A cracked booster hose is a large vacuum leak because the hose diameter is significant. The check valve that prevents vacuum from bleeding back also fails with age and can introduce air into the system.
Fuel injector O-rings: Each fuel injector seats in the intake manifold with rubber O-rings. When those O-rings harden and crack, air leaks into the manifold around the injector body. These leaks are localized to one cylinder and can cause a single-cylinder misfire alongside the lean code. Nearly impossible to find with soapy water, easy to find with smoke.
How to Read Fuel Trim Data Before You Start
If you have an OBD-II scanner, reading live fuel trim data before doing any physical testing tells you how significant the leak is and narrows down where to look. You do not need a professional scan tool for this. A basic Bluetooth OBD reader and a free phone app will show the relevant data.
Short-term fuel trim (STFT) and long-term fuel trim (LTFT) show how much the ECU is adjusting fuel delivery to compensate for the air-fuel imbalance. A reading of 0% means the engine is running perfectly balanced. Positive values mean the computer is adding fuel, which indicates the mixture is running lean.
- STFT or LTFT between +5% and +10%: Mild lean condition. Small vacuum leak likely. Start with hose connections and the throttle body area.
- STFT or LTFT above +10%: Moderate to significant lean condition. Larger leak, or multiple small leaks. Check the intake manifold gaskets and brake booster hose.
- STFT or LTFT above +20%: Large vacuum leak or a failed intake boot. The engine is unable to fully compensate. Rough idle will be obvious.
Here is the confirmation step that many guides skip: after you suspect a vacuum leak, rev the engine to 2,500 RPM and watch whether the fuel trim values drop closer to zero. Vacuum in the intake is lower at higher RPM and load, which reduces the effect of a vacuum leak. If positive fuel trims at idle drop significantly at higher RPM, this is strong confirmation that a vacuum leak (rather than a fuel system problem) is causing the lean condition.
If the fuel trims stay high even at elevated RPM, consider that a failing MAF sensor or a fuel delivery problem might be contributing alongside the vacuum leak.
What to Do the Moment You Find the Leak
Mark every leak point before you start any disassembly. It is easy to fix one obvious leak, reassemble everything, and discover there was a second smaller leak that the first one was masking. Run a complete smoke test or cover the full engine with soapy water before you start removing parts.
Once you have a complete map of all leak locations, the repair approach depends on what failed:
For small vacuum hoses, buy the correct-diameter vacuum hose from any parts store and cut a replacement section. Do not use duct tape, electrical tape, or silicone sealant on vacuum hoses. The inside of the hose is under vacuum, meaning tape on the outside does not stop air from being pulled in through a crack. Replace the section.
For the intake boot, replacement is straightforward. Loosen the clamps at both ends, remove the old boot, and install the new one. Some vehicles have the MAF sensor mounted in the boot section, so transfer it carefully to the new piece.
For the throttle body gasket, remove the throttle body (usually four bolts), clean the mating surface on both the throttle body and the manifold, install the new gasket or O-ring, and reinstall. On drive-by-wire vehicles, the throttle body may need an idle relearn procedure after reinstallation. Check your vehicle-specific procedure for this.
For intake manifold gaskets, this is a more involved job on most engines. The intake manifold has to come off, the old gaskets removed, mating surfaces cleaned and inspected for warping, and new gaskets installed with fasteners torqued to specification in the correct sequence. This is a job many experienced DIYers tackle successfully, but it requires a service manual with the torque spec and sequence, and patience with the disassembly of coolant lines and sensors that attach to the manifold on most engines.
Here is a quick reference for the most common leak locations, what the repair involves, and approximate cost.
What You Found | Fix Required | DIY Difficulty | Cost Range |
|---|---|---|---|
Cracked or brittle small vacuum hose | Replace hose with correct-diameter vacuum hose from parts store | Easy | $5-$20 |
Loose hose clamp or disconnected hose | Reconnect and tighten clamp or replace clamp | Easy | $2-$10 |
Torn or cracked intake boot | Replace intake air duct / boot assembly | Easy to moderate | $30-$120 |
Failed PCV valve or cracked PCV hose | Replace PCV valve and/or hose | Easy | $15-$60 |
Throttle body gasket leak | Remove throttle body, replace gasket or O-ring, reinstall and reset idle | Moderate | $20-$150 |
Brake booster hose failure | Replace large-diameter booster hose and check valve | Moderate | $30-$100 |
Fuel injector O-ring failure | Remove injector rail, replace O-rings on affected injectors | Moderate | $20-$80 in parts |
Intake manifold gasket failure | Remove intake manifold, replace gaskets, retorque to spec | Difficult | $80-$400 in parts; $400-$900 at shop |
After any repair, clear the stored codes with your OBD scanner and drive the car through at least one full drive cycle before checking whether the codes return. Many lean codes require a specific set of conditions to run the diagnostic monitor and confirm a clean result.
What Mechanics Catch That DIY Testing Often Misses
There are a handful of vacuum leak scenarios that the home tests do not catch reliably, worth knowing before you call a leak solved.
Leaks that only appear under load: Some intake manifold gasket failures only open up under the heat and expansion of extended driving. If your symptoms appear primarily at operating temperature or under highway conditions and disappear at idle, the soapy water test on a cold engine may come up clean. A shop with a professional smoke machine can introduce smoke at slightly higher pressure to simulate a loaded system.
Internal brake booster diaphragm failure: The smoke test will not reveal a torn diaphragm inside the brake booster. Smoke enters the booster through the vacuum hose but cannot show you a tear in the internal rubber. The symptom of a failed booster diaphragm is a firm (hard to push) brake pedal and sometimes a hissing sound that increases when you press the brake. Test the booster by pressing the brake pedal several times with the engine off to evacuate vacuum, then start the engine and feel whether the pedal drops slightly as vacuum builds. If it stays hard, suspect the booster.
Stuck-open purge valve: The EVAP purge solenoid valve vents fuel vapors from the charcoal canister into the intake. If it sticks open, it draws vapor and outside air continuously, acting like a vacuum leak. This does not show up on a smoke test because the smoke is introduced into the intake, not the EVAP canister side. If your fuel trims are high, your soapy water and smoke tests both come up clean, and you have stored P0171 or P0174 codes, the purge solenoid is worth testing next.
Hairline cracks in plastic intake manifolds: Modern plastic intake manifolds are durable but can develop hairline cracks from age or physical damage. These cracks can be nearly invisible to the eye and too small for soapy water to produce visible bubbles. Smoke finds them. If you have done a thorough soapy water test and the lean codes persist, run a smoke test before concluding the problem is elsewhere.
What Mechanics and DIYers Consistently Report About Finding These Leaks
The experience that comes up most often in vacuum leak diagnosis: the car had been showing a lean code and rough idle for months. The owner replaced the oxygen sensors, sometimes twice, because the code pointed to the O2 sensors. The lean condition never resolved. A smoke test found a cracked intake boot in under five minutes.
P0171 and P0174 do not mean the oxygen sensors are bad. They mean the oxygen sensors are correctly reporting a lean exhaust condition. The sensor is doing its job. The source of that lean condition is almost always a vacuum or intake leak, a dirty MAF sensor, or a fuel delivery problem, in that order of likelihood. Parts-swapping without confirming the source first is the single most common reason this problem takes months to solve.
The other consistent finding: leaks cluster in predictable places by vehicle. Ford 4.6 and 5.4 engines commonly develop intake manifold gasket leaks. GM V6 and V8 engines from the early 2000s had well-documented lower intake manifold gasket issues. Many BMW models develop vacuum hose cracks at specific points in the engine bay. If you search for your exact year, make, and model alongside the word “vacuum leak,” technical service bulletins and forum posts will often tell you exactly which component to smoke test first.
Mechanics also note that soapy water fails silently. If you spray it and see no bubbles, that does not always mean there is no leak. It can mean the leak is in a location that is hard to spray and observe simultaneously, or that the leak is too small to bubble with soapy water at idle vacuum levels. Smoke comes up clean or does not. That is why smoke is the standard at professional shops and why it is worth the one-time investment if you work on your own cars regularly.
Frequently Asked Questions
How do you find a vacuum leak with soapy water?
Mix dish soap and water in a spray bottle, roughly equal parts. Start the engine and let it warm up fully. Spray the soapy solution on vacuum hose connections, the throttle body gasket area, the intake boot, and intake manifold gasket surfaces. Watch for bubbles forming at any point. Bubbles indicate air escaping from a leak. Work in sections rather than spraying the entire engine at once so you can identify which area produced the result. Avoid spraying near electrical connectors, the throttle opening, or hot exhaust surfaces.
How does a smoke machine find vacuum leaks?
A smoke machine introduces dense, harmless vapor into the sealed intake system at very low pressure, typically 1 to 2 PSI. Since the intake system is sealed when the engine is off, smoke fills every passage and escapes wherever there is a gap or opening. You watch with a flashlight for wisps or streams of smoke seeping out at gasket surfaces, hose connections, sensor ports, or injector seats. It works with the engine off and finds leaks in areas too tight or too deep for soapy water to reach effectively.
Is it safe to use soapy water on a running engine?
Yes, with care. Soapy water will not harm the engine when applied in the small amounts used for leak detection. The main precautions are: do not spray near the throttle opening where it could be pulled into the intake in large quantities, keep spray away from the alternator and electrical connectors, do not apply it to hot exhaust manifolds or the catalytic converter, and stay clear of drive belts and pulleys. Used sensibly, it is one of the safest leak detection methods available.
Can I use carb cleaner or starting fluid instead of soapy water?
These methods work by causing an RPM spike when flammable fluid is pulled into the intake through a leak, but they carry a real fire risk around hot engine surfaces and the catalytic converter. A small spray of carb cleaner near a hot exhaust manifold can ignite. Soapy water produces a clear visual result with no fire risk. Smoke produces an even clearer result. Use soapy water or smoke instead.
What OBD codes indicate a vacuum leak?
P0171 (system too lean, Bank 1) and P0174 (system too lean, Bank 2) are the most common codes linked to vacuum leaks. P0300 through P0306 (misfire codes) can also result from a vacuum leak that is pulling enough air to cause lean misfire on specific cylinders. P0507 (idle air control system higher than expected RPM) can also follow from a large vacuum leak. Seeing P0171 and P0174 together on a V engine strongly suggests a central large leak rather than a small localized one.
What is the most common location for a vacuum leak?
On most vehicles with more than 80,000 miles, small vacuum hoses at their connection points are the most common failure. The rubber hardens with age and heat, cracks at the point where it stretches over a fitting nipple, and lets air past. The intake boot is the second most common on many platforms, followed by the throttle body gasket and PCV system. Intake manifold gaskets are the most significant failure and are associated with specific vehicle platforms rather than uniform wear across all engines.
Do I need to clear the check engine light after fixing a vacuum leak?
Yes. Fixing the leak stops the lean condition but does not automatically clear the stored code. Use an OBD-II scanner to erase the code after the repair. Then drive through at least one complete drive cycle, which typically includes a cold start, extended idle, highway driving, and return to idle. If the repair was successful, the monitor will run and the code will not return. If the code comes back, either the leak was not fully repaired or there is a second contributing issue.
How much does it cost to fix a vacuum leak at a shop?
Simple hose replacements are inexpensive, often $50 to $150 at a shop including labor. Throttle body gasket replacement runs $100 to $300 depending on the vehicle and access. Intake manifold gaskets are the most labor-intensive, typically costing $400 to $900 at an independent shop, more at a dealership. The smoke test itself, if done by a shop, usually costs $75 to $150 as a diagnostic fee.
The Bottom Line
A vacuum leak is one of the few engine problems that a patient, methodical DIYer can find faster and more completely than a quick-look inspection at a shop. The tools cost almost nothing. The process is straightforward. And between soapy water and smoke, the leak has nowhere to hide.
Soapy water is your starting point when the leak is likely at an accessible hose connection or the throttle body flange. Smoke is your answer when soapy water comes up clean but the codes and symptoms continue, when the leak is in a deep or inaccessible location, or when you want to confirm that every leak has been found before you start reassembling components.
Find the leak, fix the right component, clear the code, and confirm the fuel trims return to near zero. That sequence, done in order, solves this problem correctly every time.